You’ve spent months, maybe years, poring over maps for your Alaskan moose hunt. You’ve e-scouted for countless hours, pinpointing promising spots and flying over every ridge with 3D maps. Your Waypoints are saved, your Offline Maps are downloaded. You’re ready. And yet…
The bush plane starts its descent. You peer out the window and take in Alaska’s vast expanse for the first time with your own eyes. The magnitude overwhelms you. Your boots touch ground. Hours later, at camp, it dawns on you that the terrain you’re seeing doesn’t perfectly match how you envisioned it while e-scouting.
I’ve been there, and I’m sharing my lessons learned from two DIY Alaskan moose hunts so you can gain a stronger understanding of how the terrain you see on-screen translates into real-world experiences.
Background: My DIY Alaskan Moose Hunts
After two DIY Alaska moose hunts, I’ve learned firsthand how to bridge the gap between the digital lines on a map and the rugged reality of the wilderness. It’s one thing to study topography and satellite imagery from the comfort of home, but translating that into effective navigation and a hunting strategy in the field is a skill forged through experience.
My first Alaska moose hunt taught me that a promising meadow on the map might be a swampy mess in person, while my second hunt showed me how to spot subtle terrain features—like faint ridges or hidden clearings—that don’t pop on a screen but can be moose magnets.
By combining pre-trip scouting with onX Hunt’s detailed tools and real-time GPS tracking, I’ve developed a system to anticipate challenges, prioritize high-potential areas, and adapt when the landscape throws curveballs. I’ll break down the key lessons, from decoding map features to ground-truthing your plan, so you can move through Alaska’s vast terrain with confidence and focus on finding that trophy bull.
Essential Mapping Tools
In the following four hunt scenario breakdowns, I leverage several onX Hunt tools. A few of the most critical features for Alaskan moose hunts include:
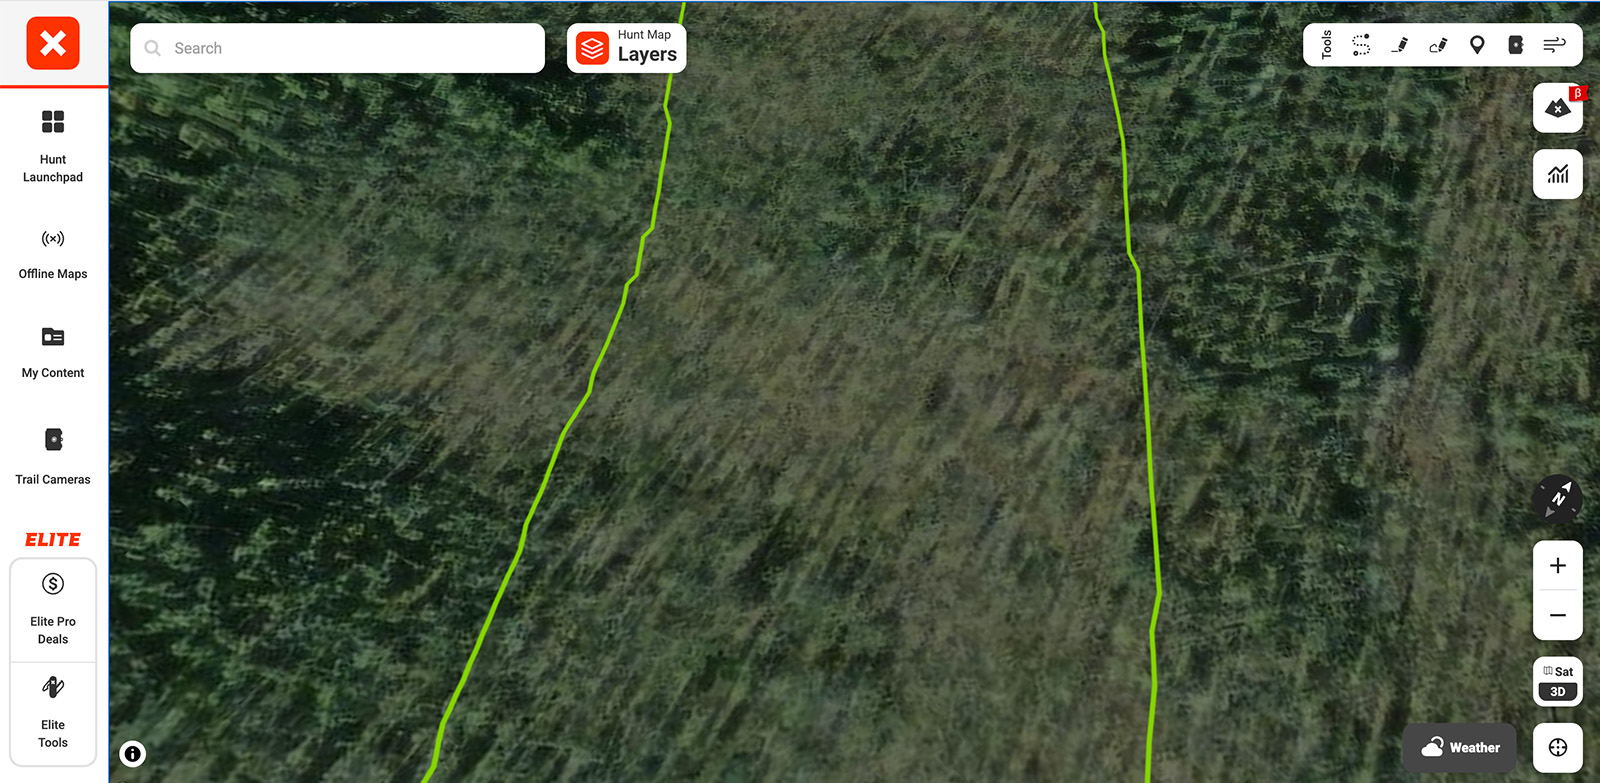
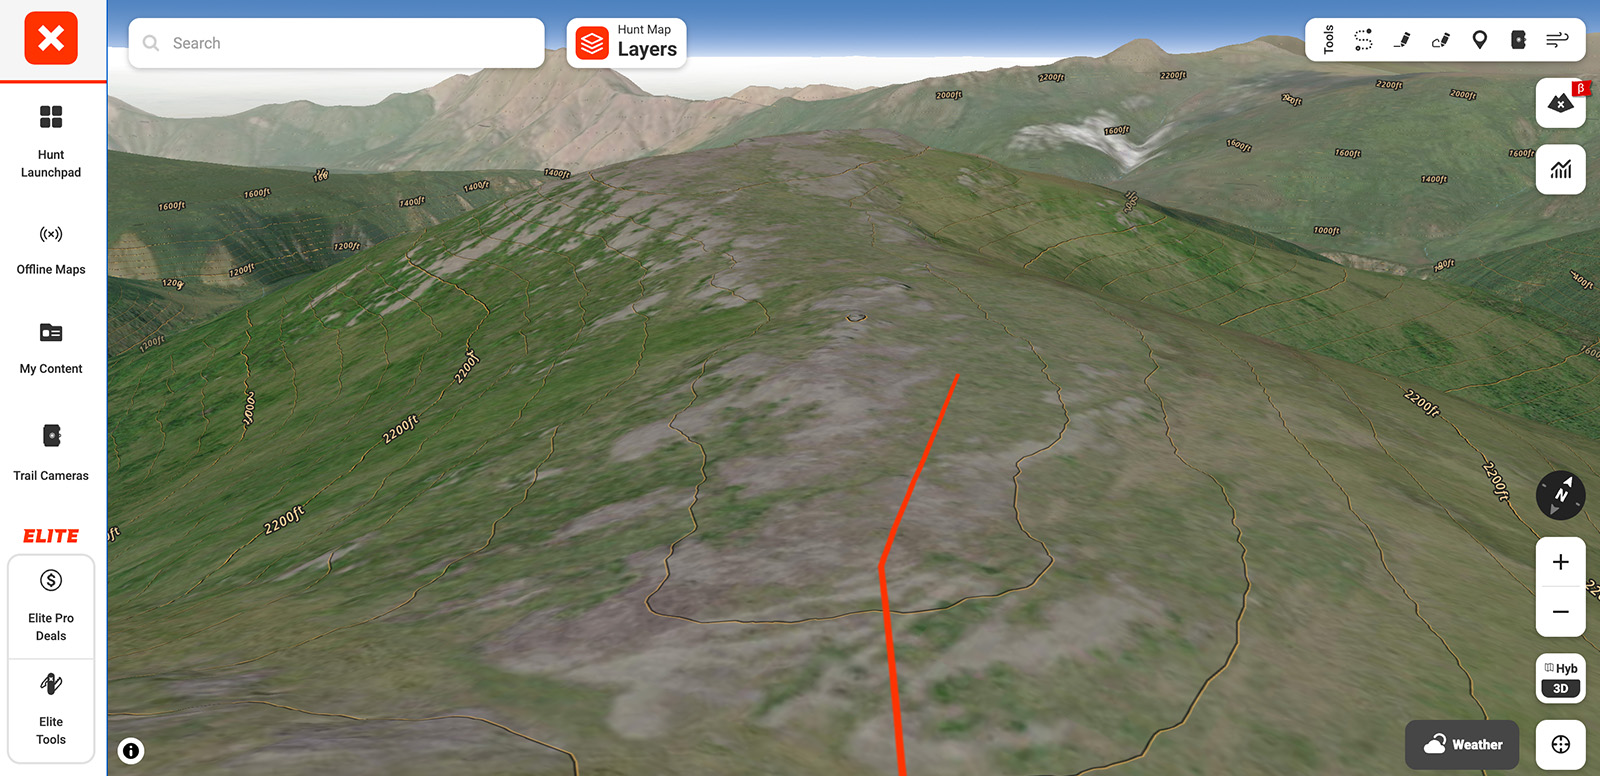
Aerial Imagery (shown below): Critical for scouting Alaska moose habitats, Aerial Imagery allows hunters to identify open meadows, explore water features like rivers and lakes, and assess the density of forest cover. By zooming in on satellite views, you can determine the thickness of vegetation to pinpoint glassable areas or dense thickets where moose may hide, enhancing your pre-trip planning and in-field strategy.
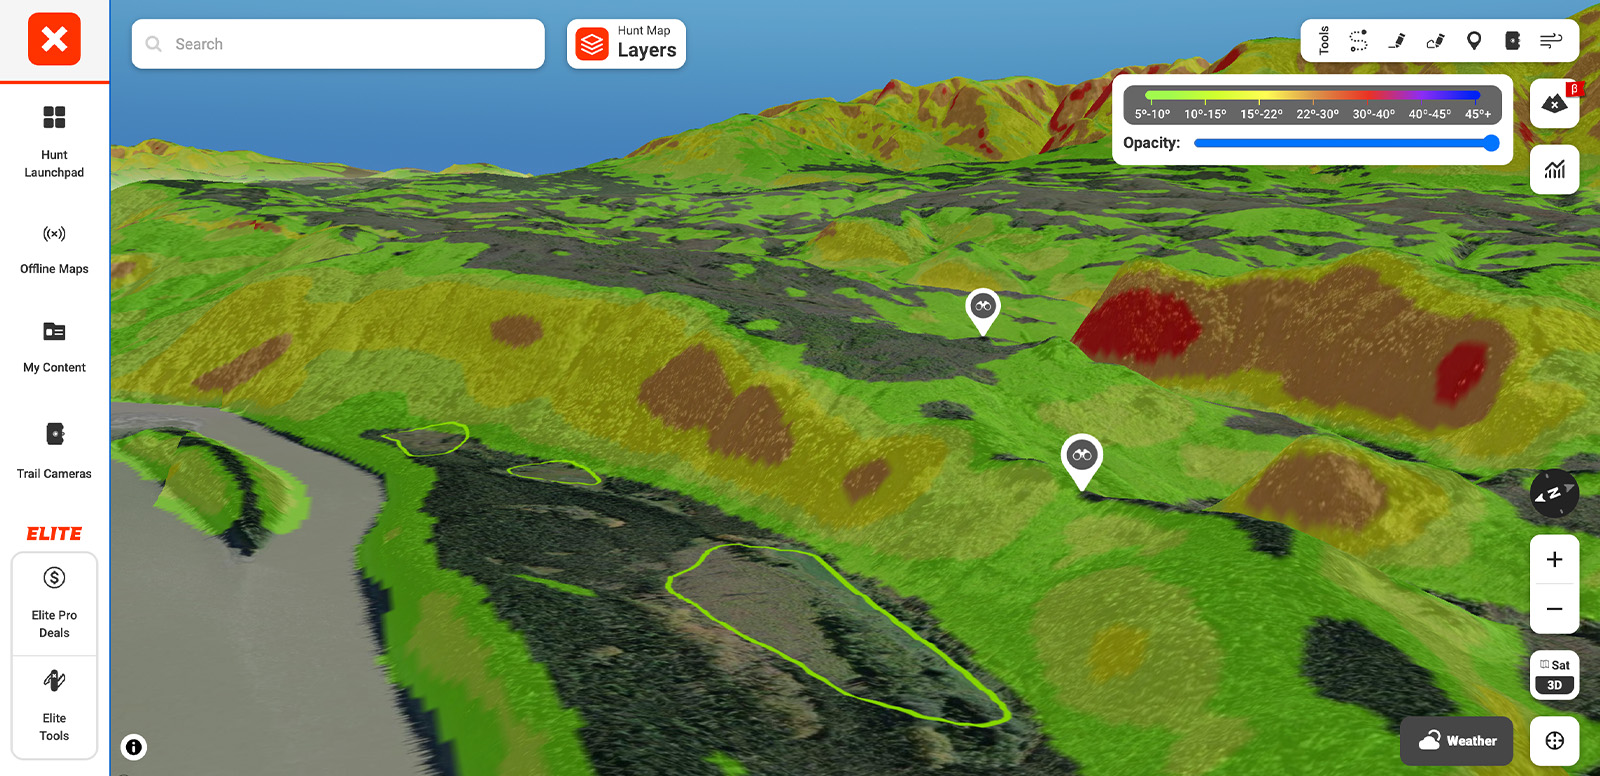
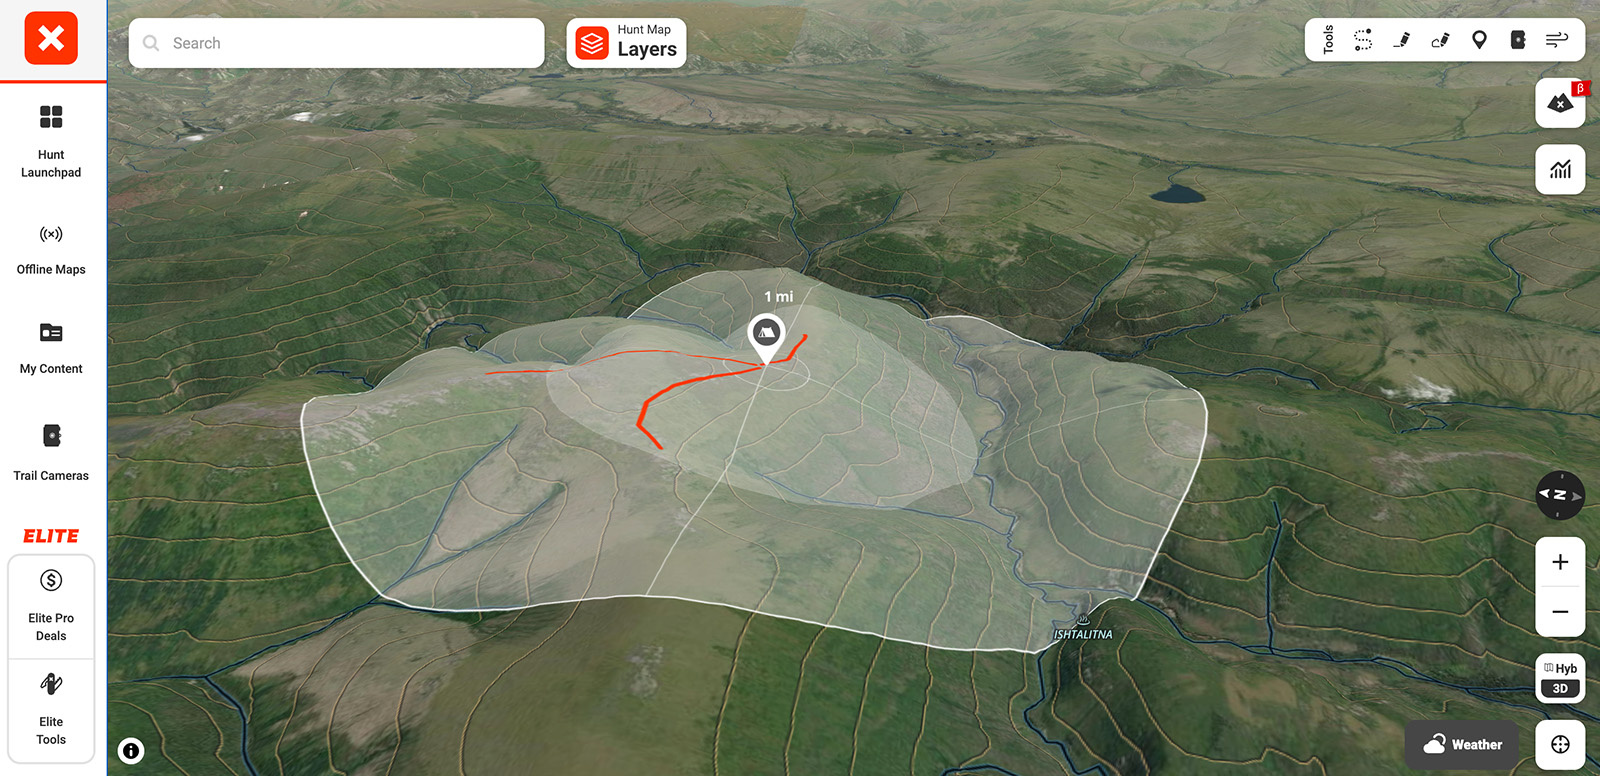
3D With Elevation Exaggeration (shown below): When in 3D mode, use the Elevation Exaggeration feature to amplify subtle terrain features like ridges and meadows, making it easier to identify prime moose habitats in Alaska’s vast wilderness. By adjusting the slider in 3D mode, hunters can pinpoint glassable vantage points for spotting bulls or calling during the rut. This tool helps plan efficient routes within a one-mile packing radius, ideal for drop camps or river floats. Pairing 3D views with onX’s Hybrid Basemap reveals moose-friendly river corridors and subalpine zones, boosting your scouting success.
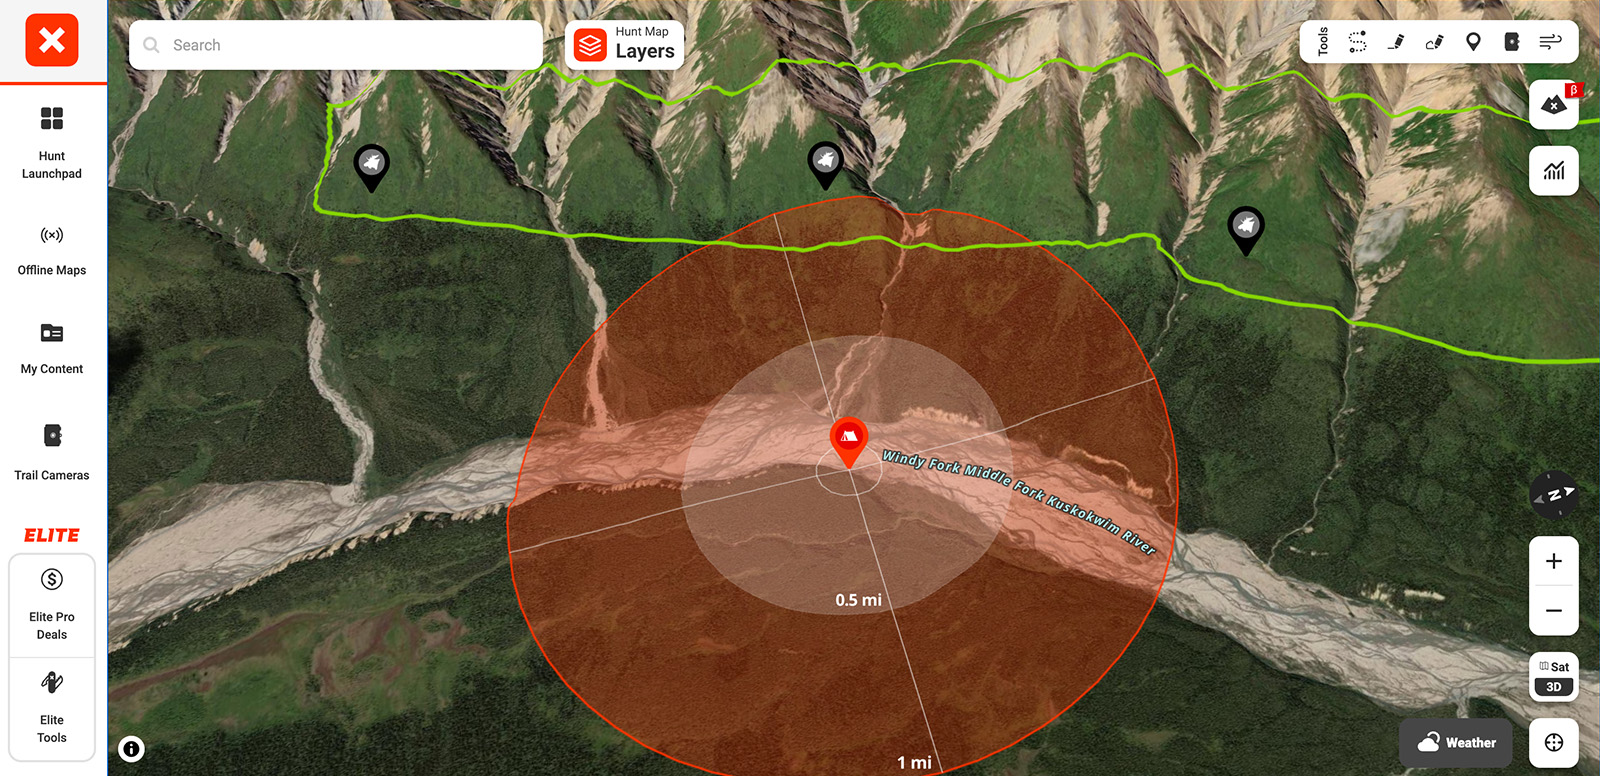
Waypoints Radius (shown below): When e-scouting for Alaska moose, mark promising camping or glassing locations with Waypoints. Always use the relevant icon and customize the name so you can easily recall what’s what when you’re in the field. Use the Waypoint radius tool to set a one-mile perimeter around each Waypoint, defining your practical hunting area based on the feasible distance for packing out a moose on a DIY hunt. This ensures you focus scouting efforts within this zone, as packing a moose from two, three, or four miles away is often physically impractical. By organizing Waypoints and radii, you streamline e-scouting by staying focused on high-potential areas.
Alaskan Moose Hunt Scenario Breakdowns
Map locations are approximations and offer representations of areas similar to my real-life experiences. Use the left and right arrows to explore each scenario breakdown.
Hunt Scenario Breakdown 1
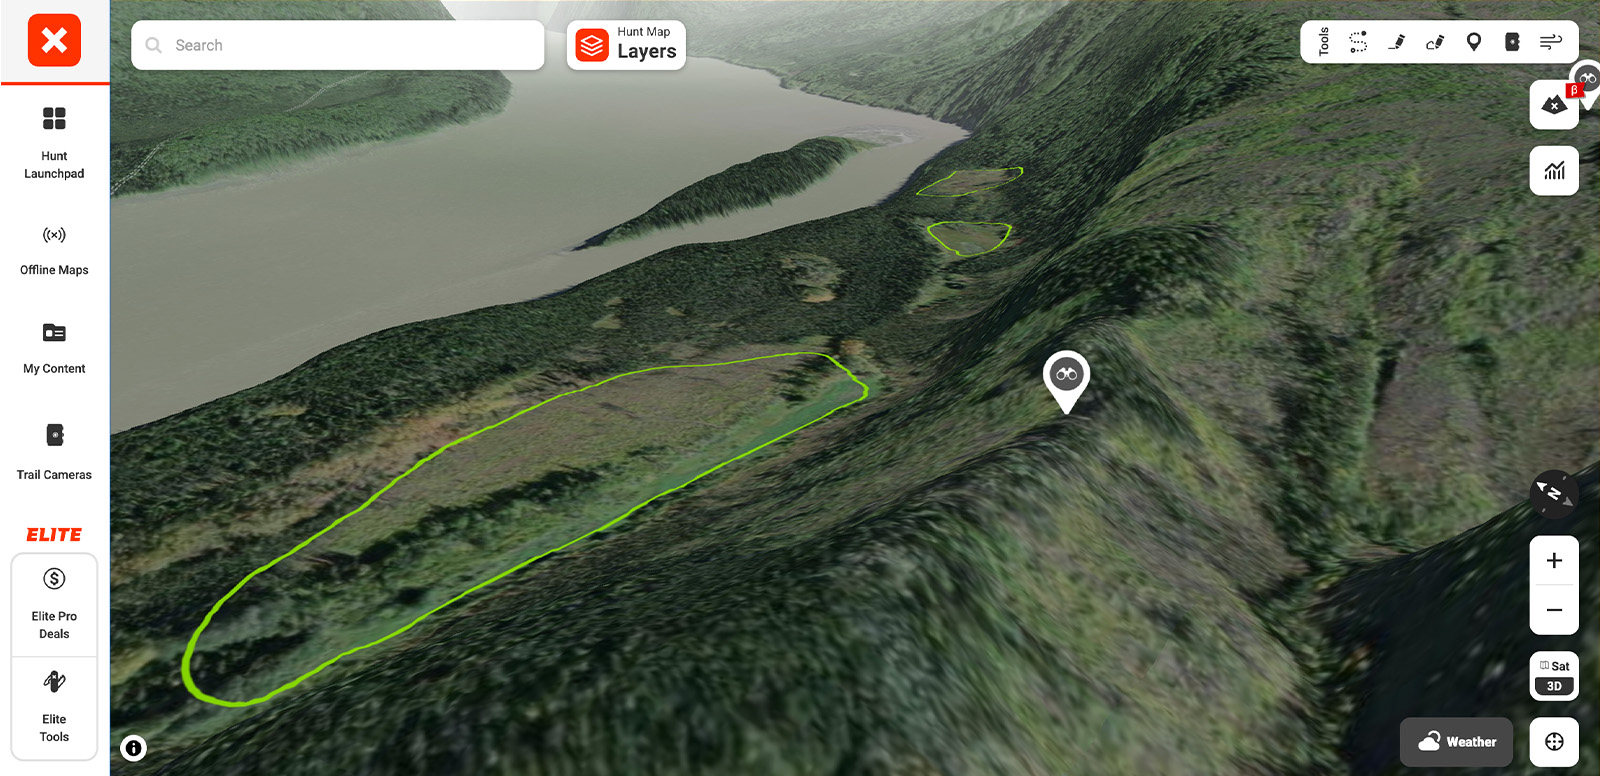
River Tributary Camp
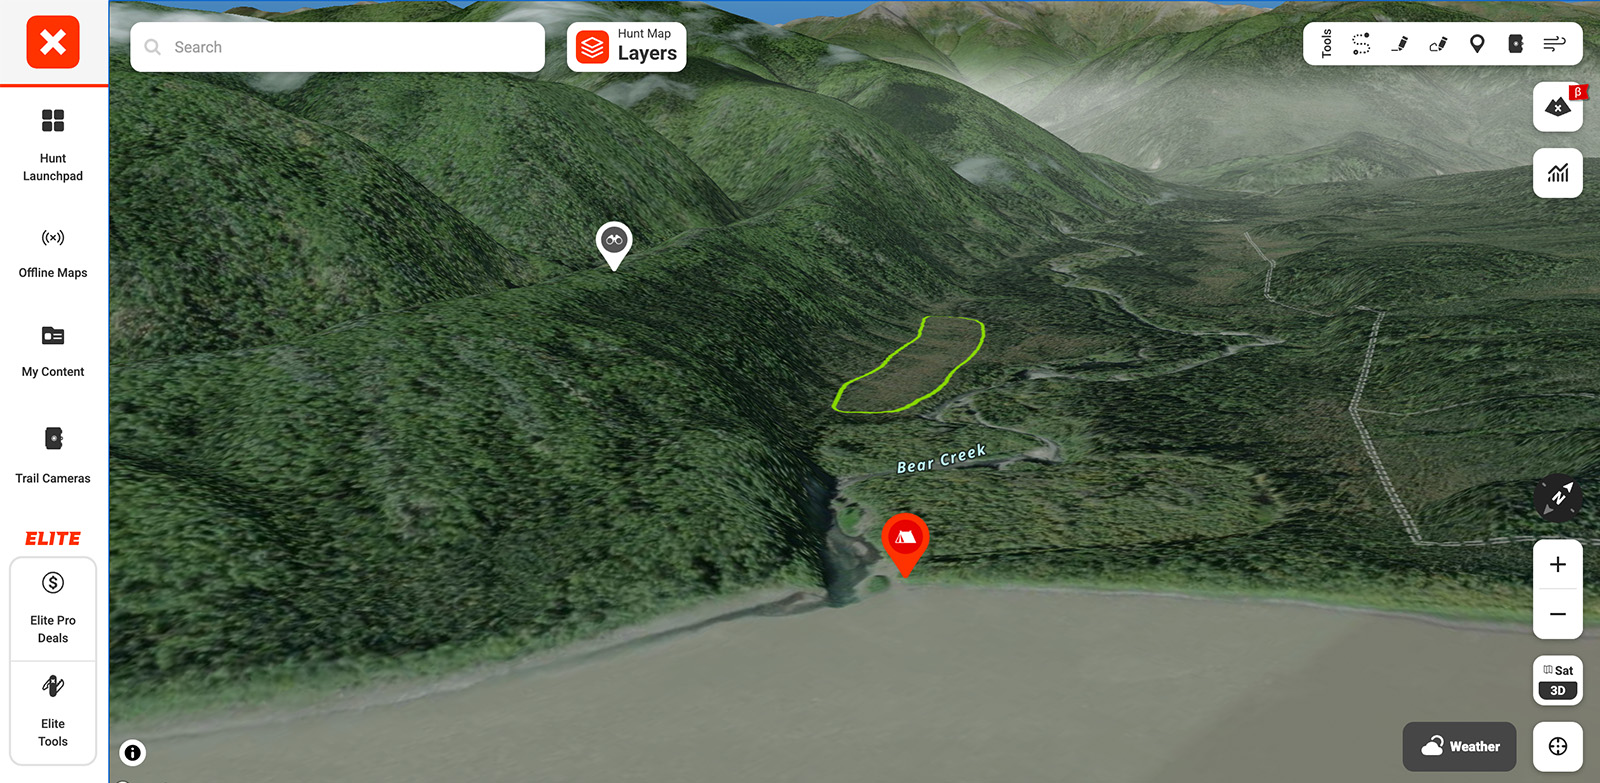
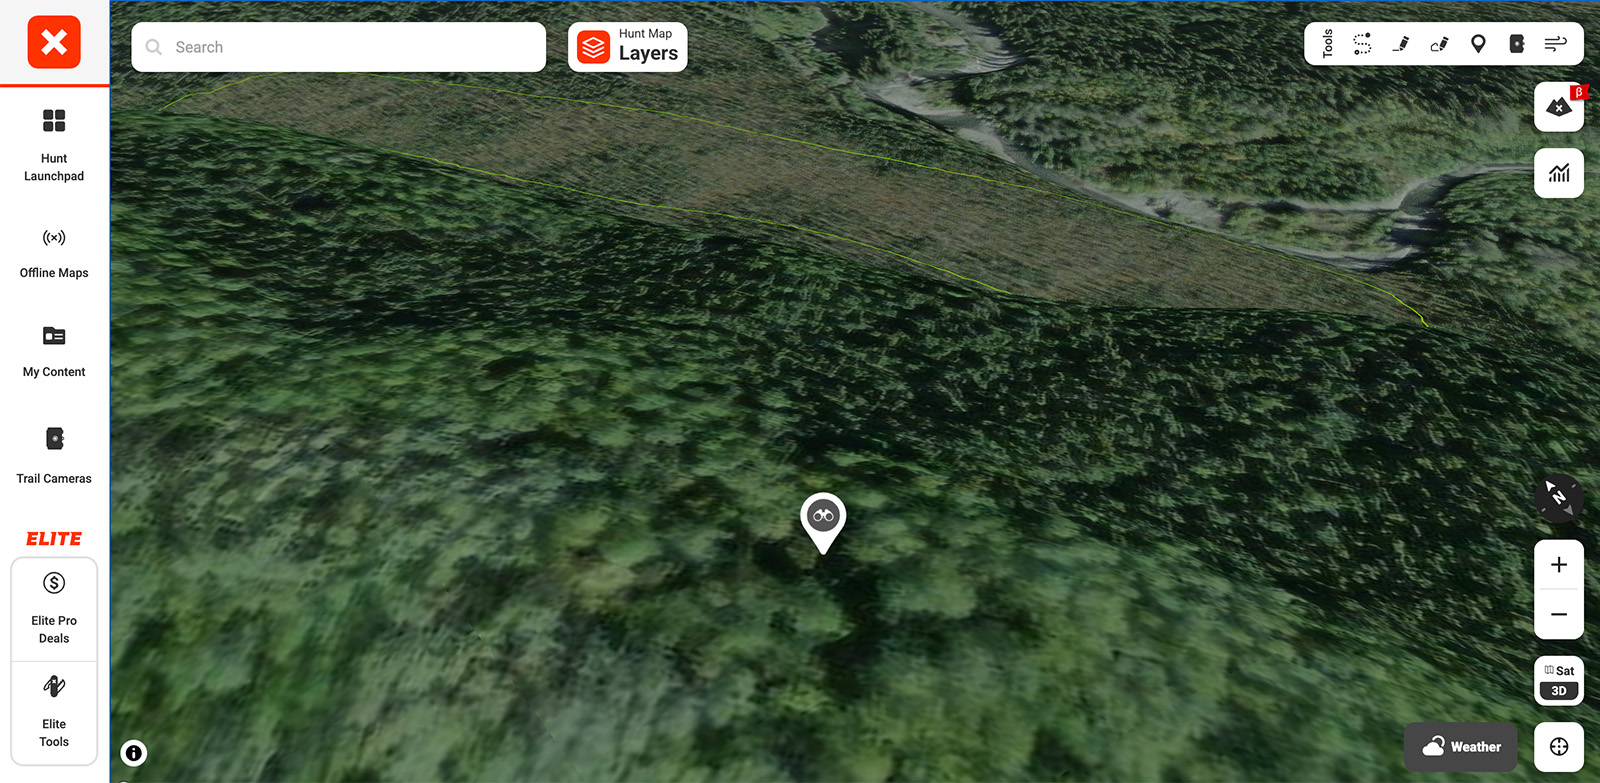
Scenario 1 Takeaway
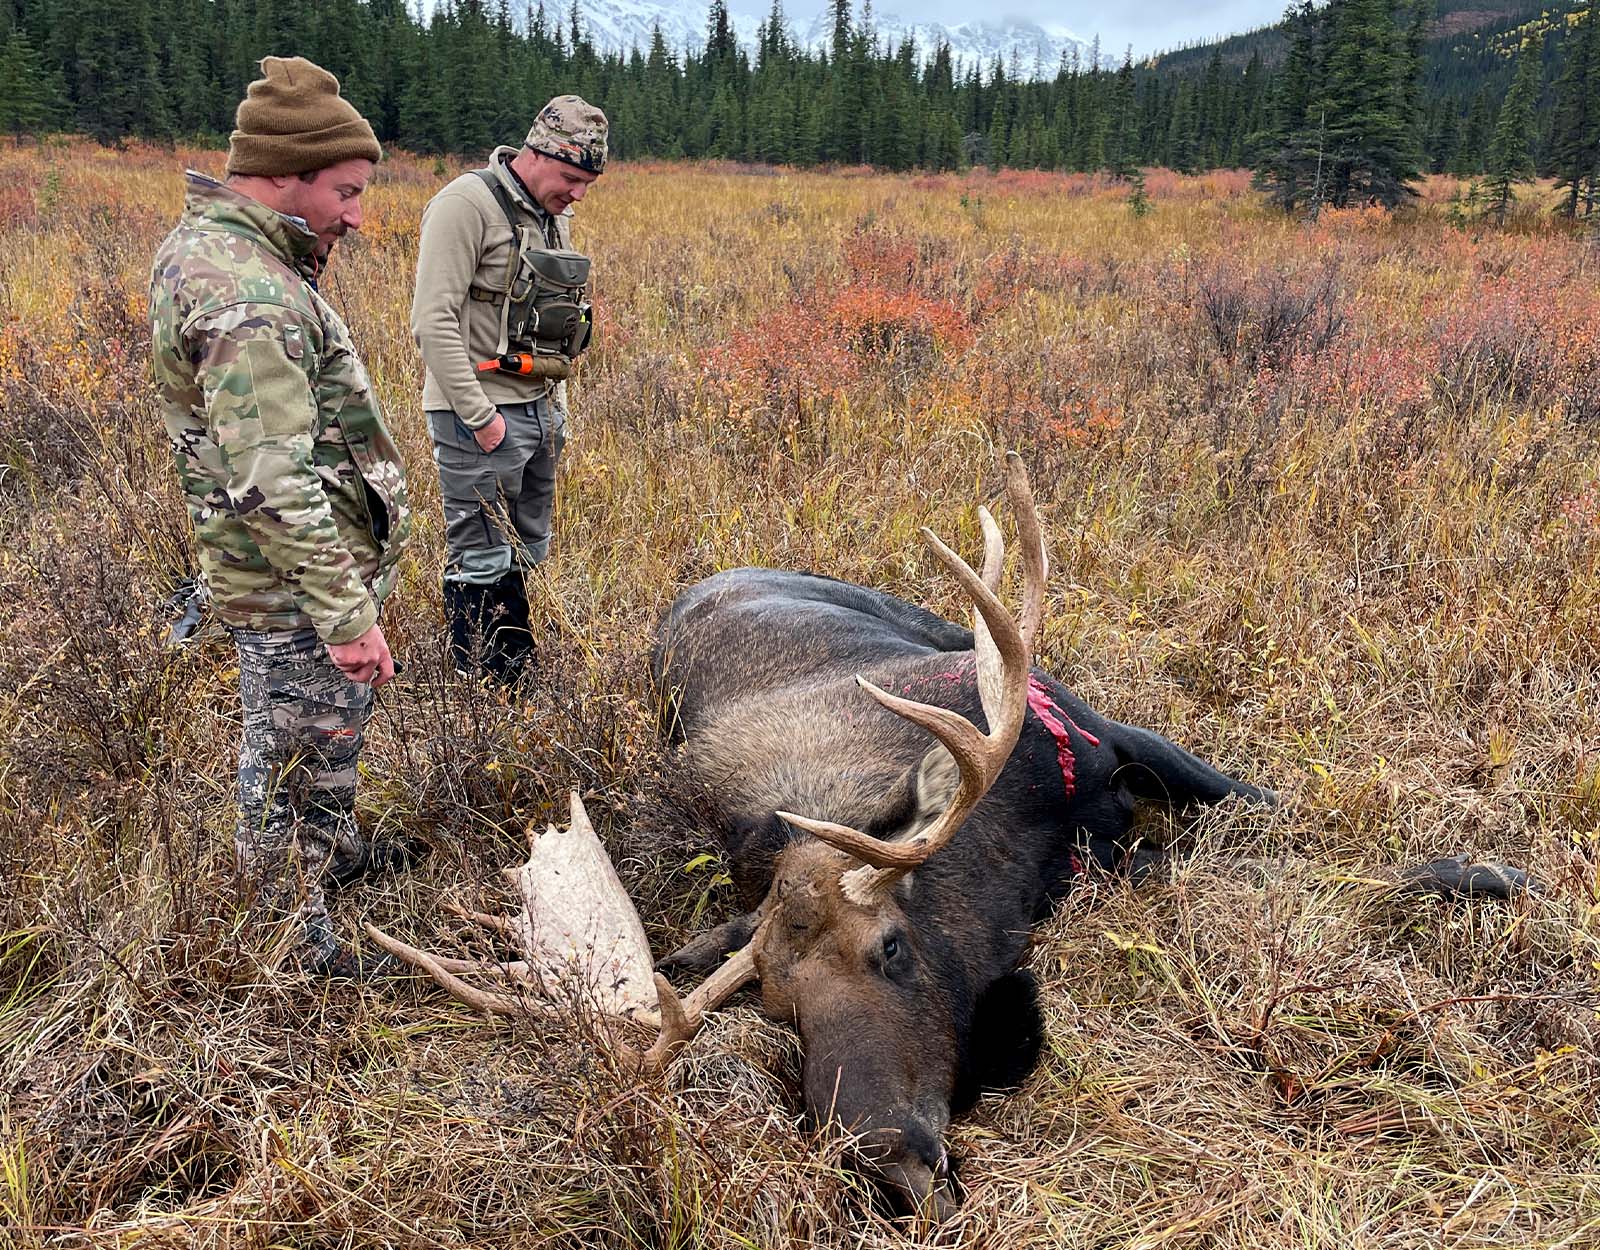
While you might successfully call a moose into this location during the rut, the dense vegetation and obstructed views could make it nearly impossible to get a clear shot.
This scenario highlights how easy it is to think a location is a prime location on the screen, only to appreciate the reality once you’re there. Ideally, you want meadows with minimal to no trees and lookout points clear of large timber to maximize visibility. When e-scouting, avoid this scenario by taking the time to flip 3D mode on and really zoom in on the features to get an eye-level of view of what you’re likely to see.
Hunt Scenario Breakdown 2
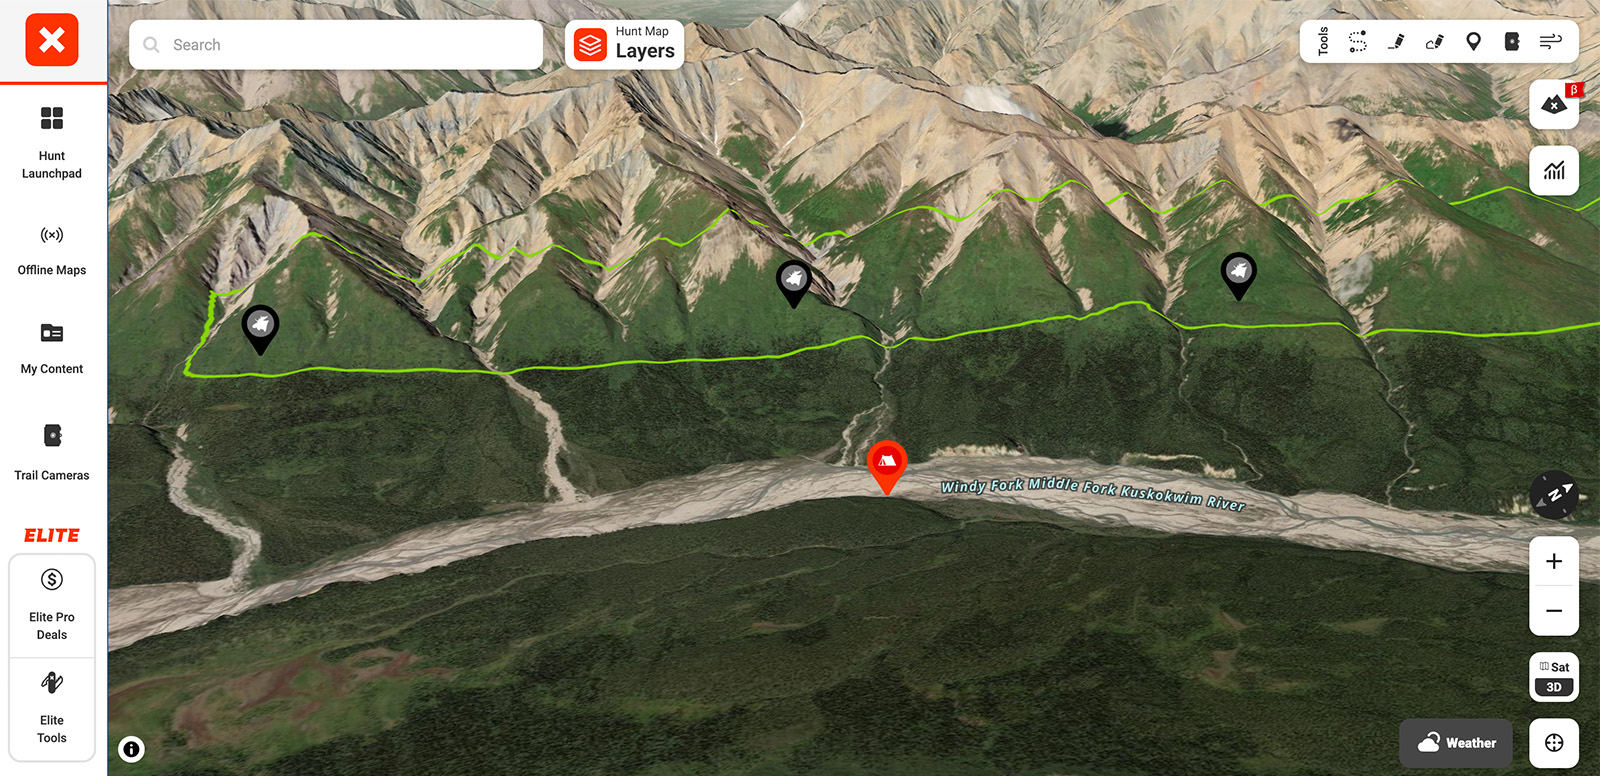
Downriver Hotspot
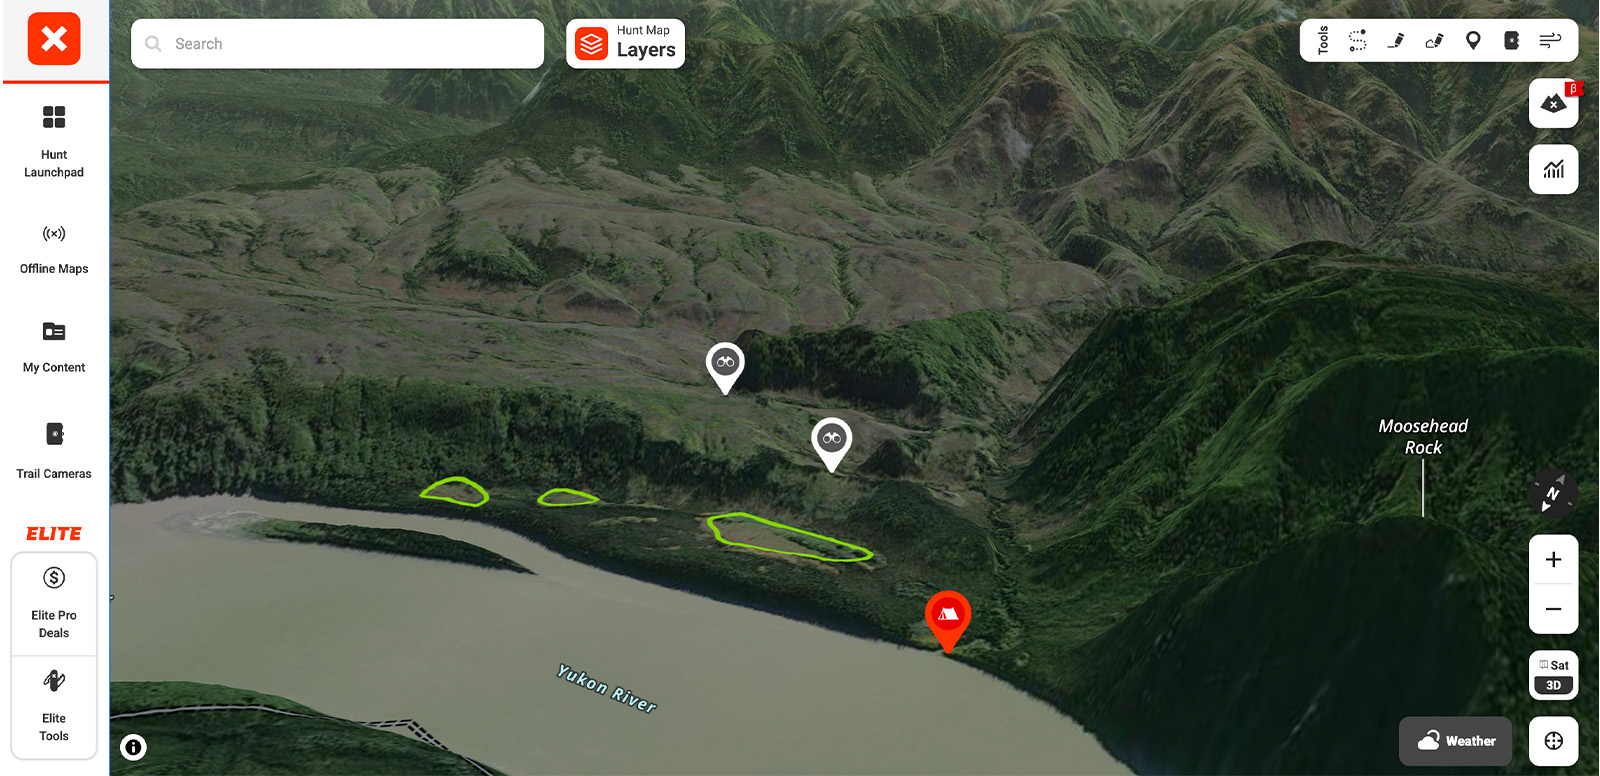
Scenario 2 Takeaway
With patience, a few days here could yield an intercept with a traveling bull. Plus, the location falls well within the practical one-mile radius for packing out a moose, balancing accessibility with prime hunting potential.
Hunt Scenario Breakdown 3
High Mountain Glassing

Scenario 3 Takeaway
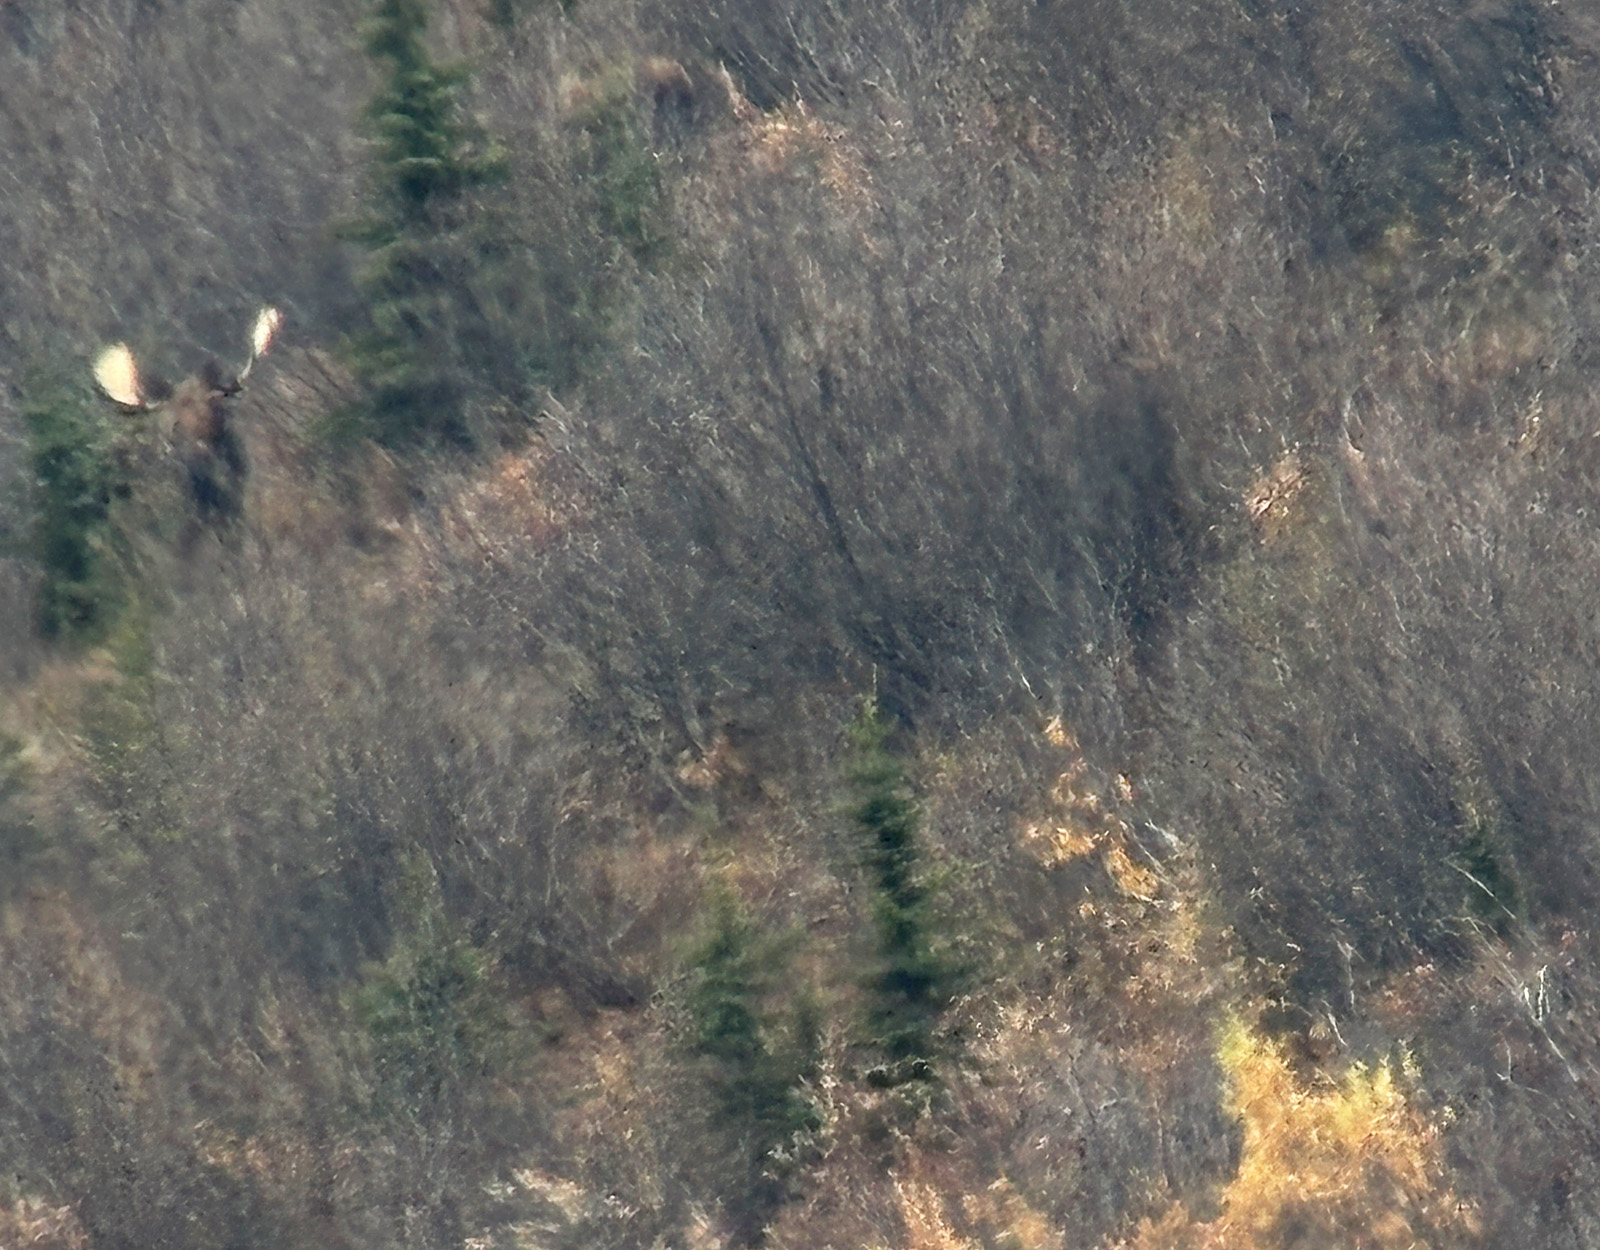
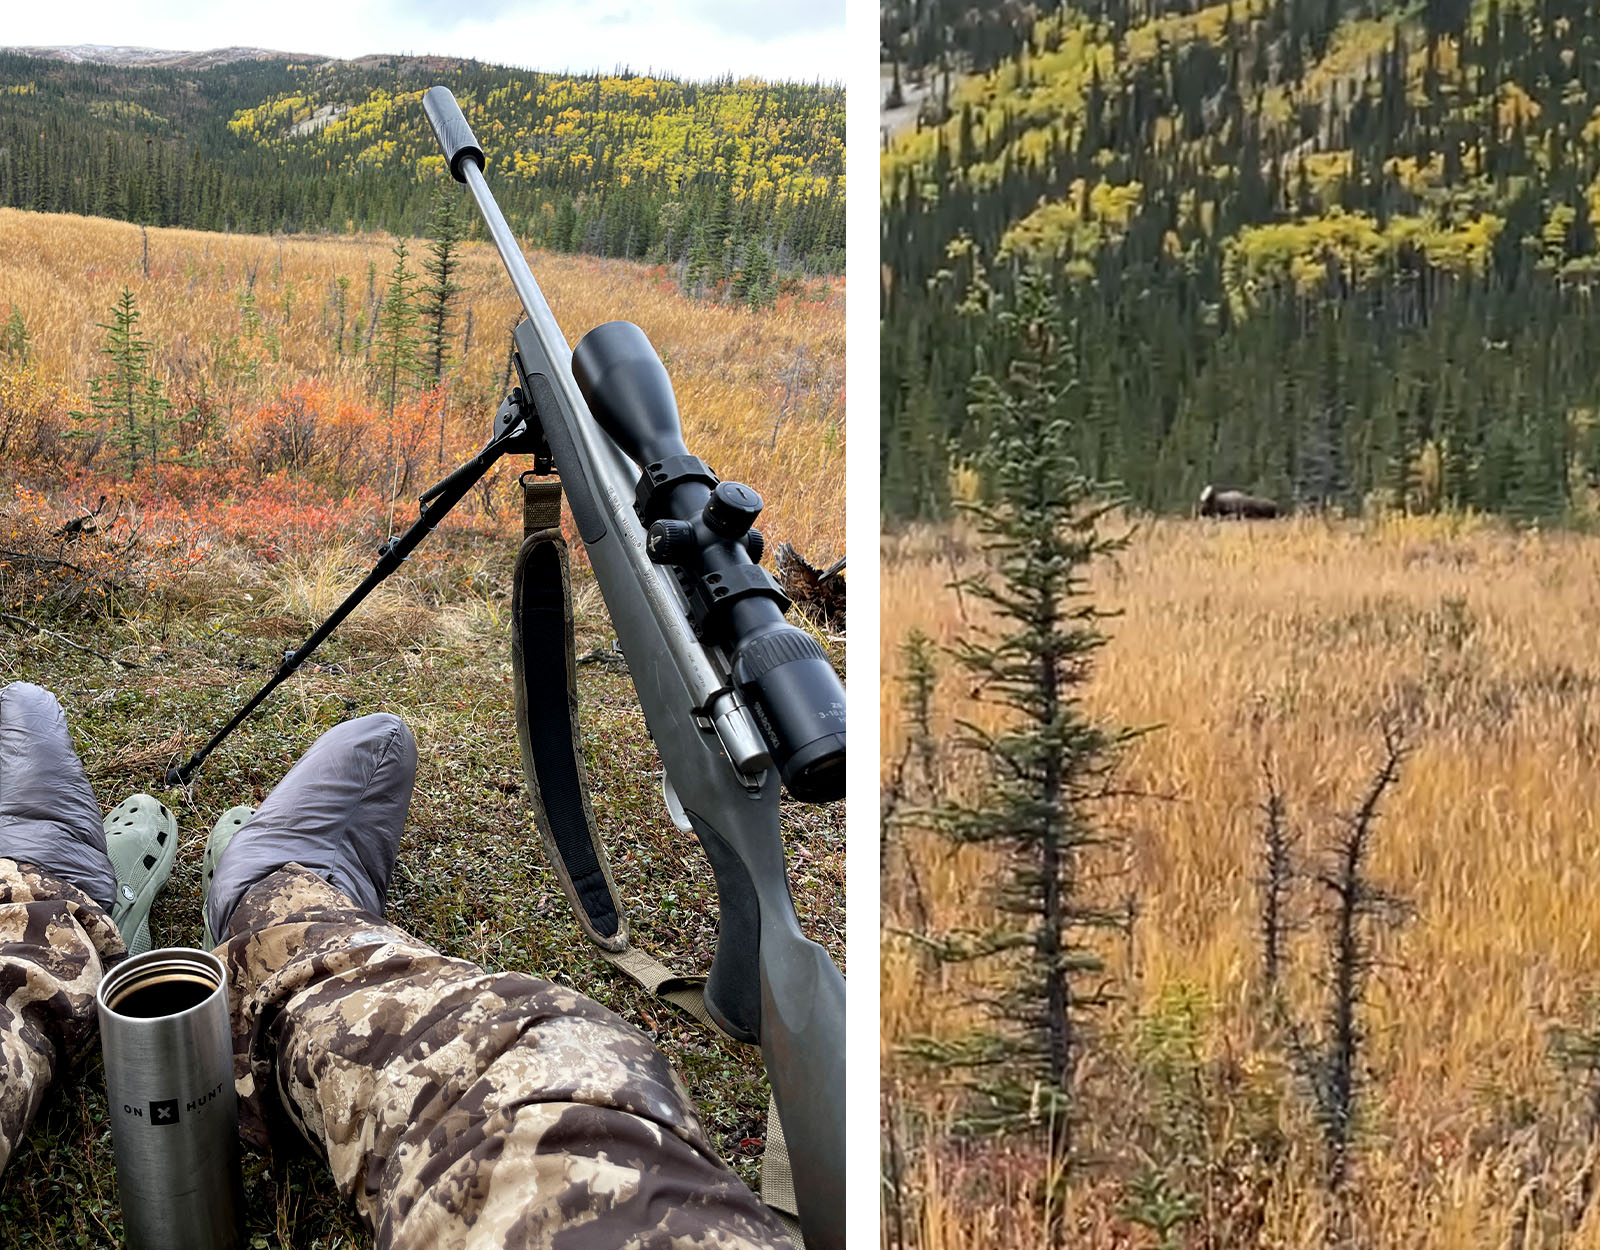
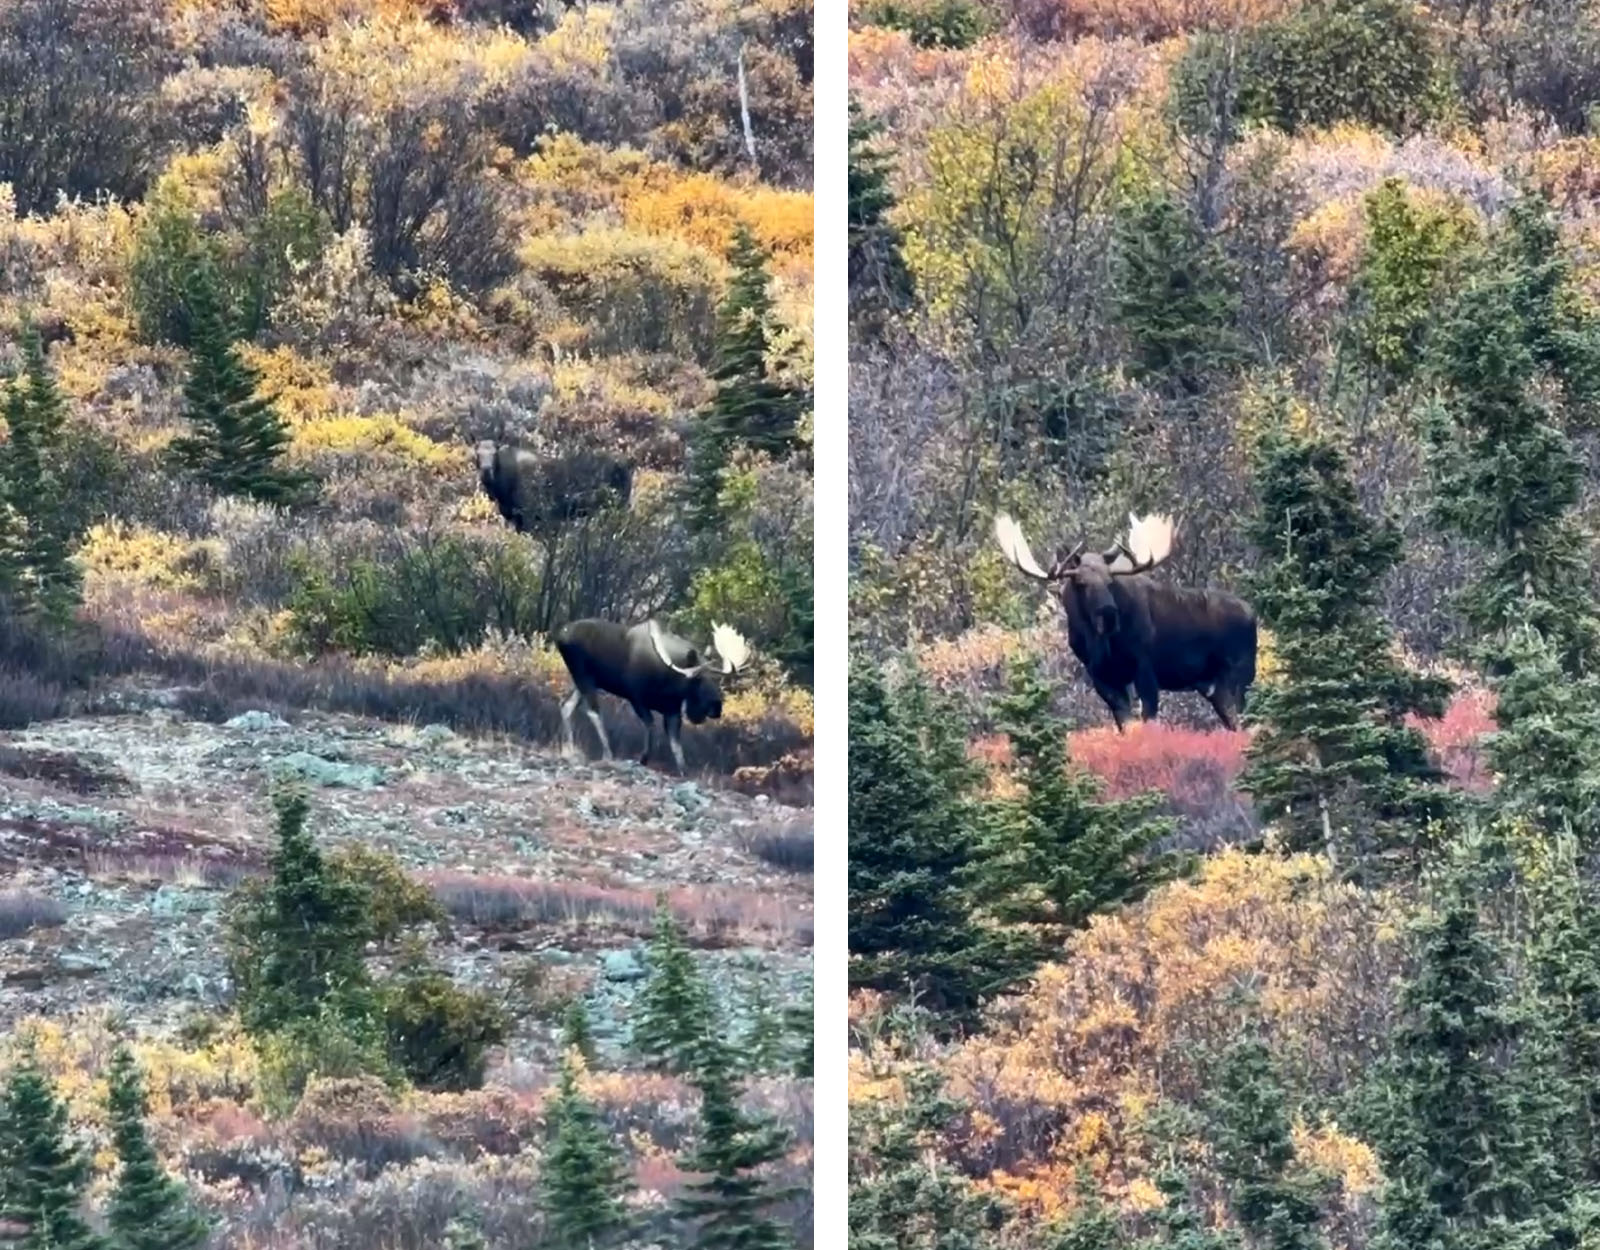
In high mountain spot-and-stalk areas like this one, patience is key—moose will drift in and out of view on distant mountainsides, and you’ll settle in with your spotting scope and Ollin phone mount to capture images and assess antler spreads. This type of setup is critical for confirming legal bulls (50 inches or four brow tines), saving you from wasting precious time chasing sublegal moose.
Hunt Scenario Breakdown 4
Drop Camp
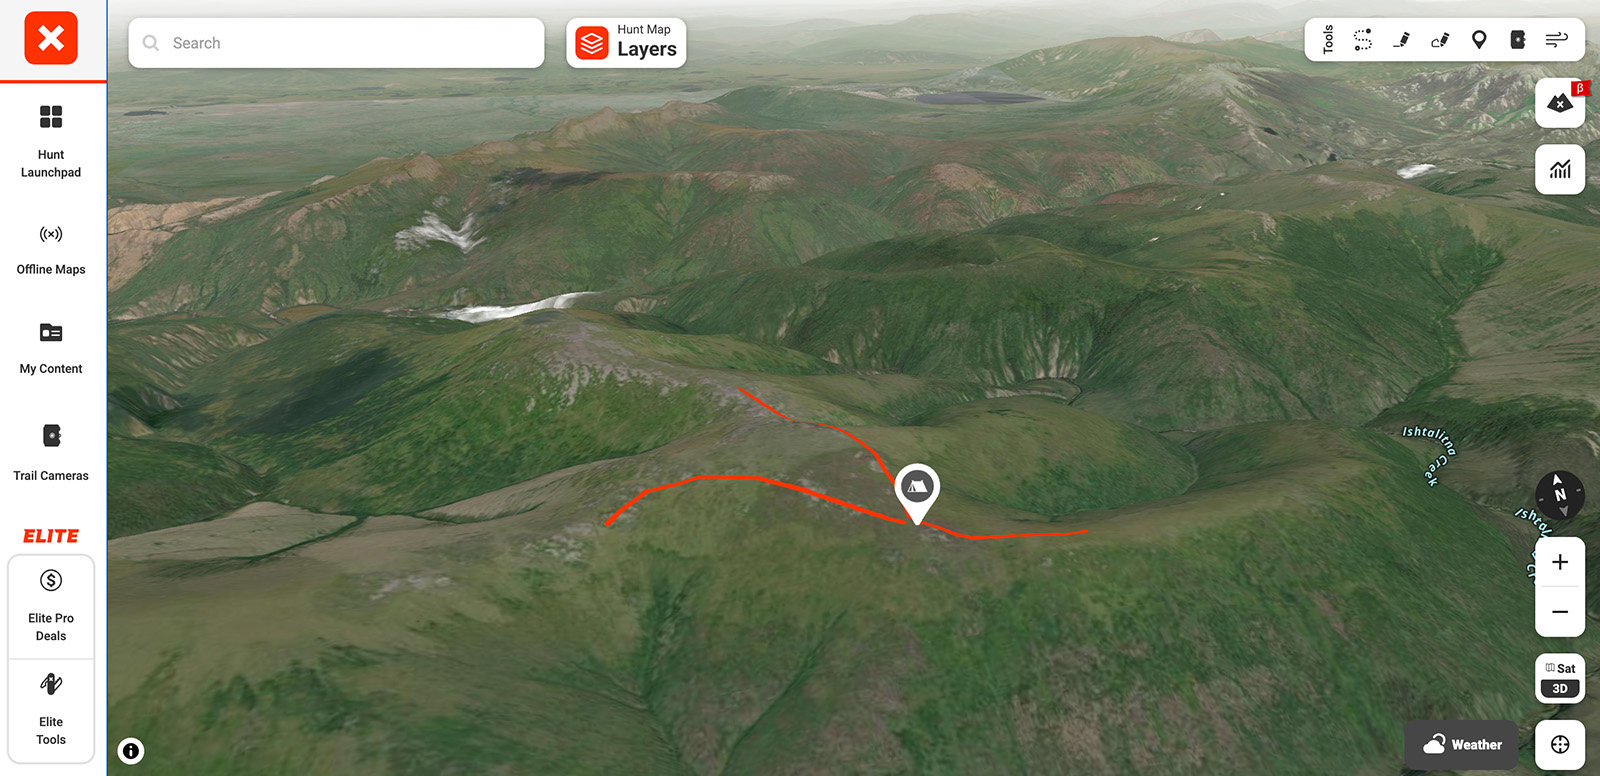
Scenario 4 Takeaway
Patience is crucial: Focus on calling and glassing from high ground to draw moose in or intercept them in valleys, avoiding unnecessary movement that spreads scent. If terrain is walkable and time allows (e.g., early in the hunt), expand to a two-mile radius to pursue distant bulls, but late in the hunt (e.g., Day 8), stick closer to ensure you can pack out meat in time.

Bonus Tip: Capture Your Own Aerial Imagery
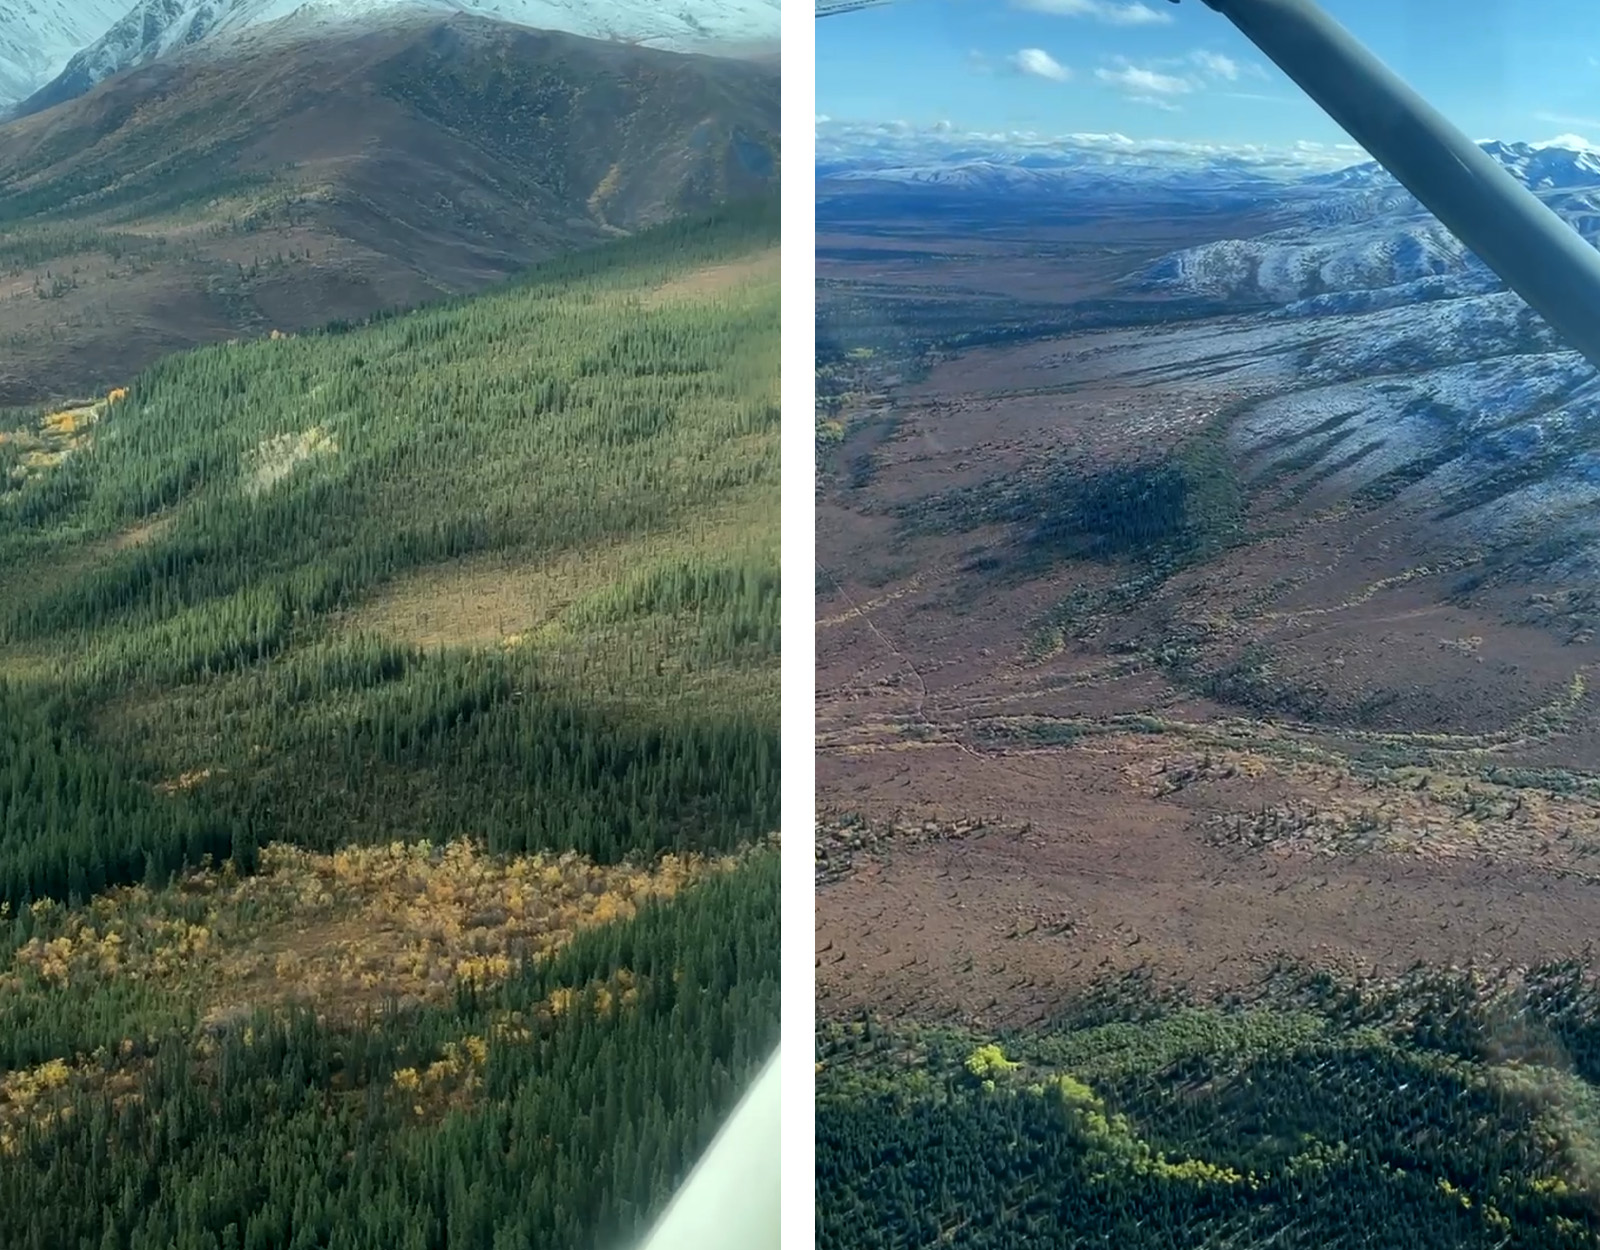
One of the most effective tricks for a DIY Alaska moose hunt is capturing your own aerial imagery during your flight in—a simple move with big rewards. Use your phone’s video feature to record the landscape below.
For river floats, pilots often follow the river to your drop-off, giving you a chance to catalog potential stops like meadows, ponds, or glassing spots. In a drop camp, pilots typically circle the runway once or twice to check wind and runway conditions, offering a 360-degree view of your hunting area, perfectly scaled to the 1-2 mile radius you’ll hunt.
Review these videos during your hunt to refine your strategy as plans evolve. Below, I’ve included examples of high-quality phone-captured imagery from our fly-in hunts to show the level of detail you can expect.